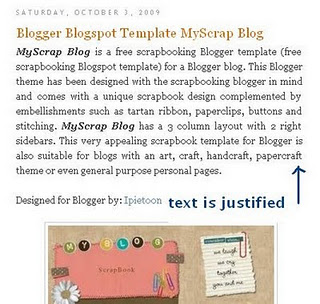
 After align justify
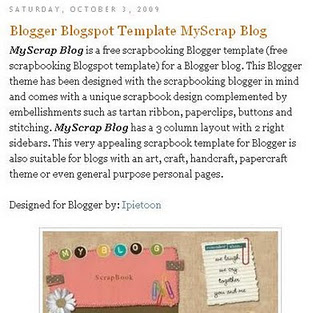
 Before align justify
Although blogging has been widely known since ever, many features on the pages are still unknown. Bloggers often ask questions about how to customize the appearance of many features inside their Blogger templates (Blogspot templates). There are many custom Blogger templates available to download to change or enhance the appearance of the pages instantly. However, simple CSS styling tricks and tips can also bring good customization to some features on the blog. A little learning of CSS can enrich your skills and beautify the appearance of the blogs. Therefore, before you decide to download the ready-to-use templates, it is good to try customizing the existing ones.
The tutorial provided below is only a part of a series of articles discussing about tricks to customize Blogger templates using CSS styling. The explanations are provided as comprehensive as possible allowing beginners and newbie to understand the simple steps. Keep on reading to know some good and easy procedures to enhance the appearance of your Blogger templates.
The default settings only allow you to choose one from two text alignments, which are left and right. Either way, your texts will be aligned to one side while the other side is ragged. Actually, it is easy to change this to justified alignment. CSS styling section of the Blogger template brings the options to add another line to the text. It is the secret to create justified alignment to the Blogger templates.
There is also another way to change this alignment setting. As shown in MS word and many other word processing programs, justified alignment means that the text will be stretched from the center. Therefore, each of the edges of the text (left and right) will be in a straight line from up to bottom. Such appearance is common in newspapers and magazines. Although it sounds like a real simple feature and option, you can see that there will be huge differences in the overall designs of the page. Smart Bloggers aware of this feature and most of them choose to make a justified alignment for better Blogspot posts. The following explanations will list systematic procedures to create a justified alignment to the Blogspot templates.
- Before you begin any customization, please make sure that the text is not already in justified alignment. The following procedures can only be done if the text is left aligned. If it is already in justified alignment, you will not need to follow the next steps
- Make sure you are logged in
- From the Dashboard, click the Layout link for your blog and choose Edit HTML
- In order to avoid any mistake, please back up your template by downloading it in a full
- Press CTRL + F to find a code block beginning with .post in the CSS styling section of Blogger template. Most code blocks are made in typical format. Although there is a great diversity in templates, the code blocks are mostly the same. Example:
.post {
margin:.5em 0 1.5em;
border-bottom:1px dotted $bordercolor;
padding-bottom:1.5em;
}
margin:.5em 0 1.5em;
border-bottom:1px dotted $bordercolor;
padding-bottom:1.5em;
}
- Add the following line and it will turn like this:
.post {
margin:.5em 0 1.5em;
border-bottom:1px dotted $bordercolor;
padding-bottom:1.5em;
text-align:justify;
}
margin:.5em 0 1.5em;
border-bottom:1px dotted $bordercolor;
padding-bottom:1.5em;
text-align:justify;
}
- Click on Save Template
- Click View Blog to see the alignment of all your posts has now changed to justified
If the Blogger template is already aligned in justified order, you can also change/align it left. Repeat the above procedures, find the code block and modify it. Add the following code:
text-align:left;
The new code block will be:
.post {
margin:.5em 0 1.5em;
border-bottom:1px dotted $bordercolor;
padding-bottom:1.5em;
text-align:left;
}
margin:.5em 0 1.5em;
border-bottom:1px dotted $bordercolor;
padding-bottom:1.5em;
text-align:left;
}
The entire steps provided above only take approximately a minute. They are easy, simple and useful to enhance the appearance of your blog.


0 comments:
Post a Comment